diy: wrap-around floating shelves
I made all the mistakes just so I could tell you how to avoid them. Or that's at least what I'm telling myself as a coping mechanism. LOL. Let's get started.
Demolition
I decided I wanted floating shelves that wrapped around the closet because the current cabinets were not functional. They were too high, the doors never closed and I couldn't reach across the washer & drier to even put anything in them. I figured having the shelves wrap around would make things more accessible for me, and add more storage space. So, I decided to DEMO!! The demolition was probably the most fun of this project. First, I took of the doors of the cabinets. I then used a prybar to remove all of the trim. I used my HART reciprocating saw to cut the cabinets into smaller pieces since they were nailed into the wall with 6" nails. Learning how the previous owners installed these cabinets makes me very scared to ever attempt the much needed kitchen renovation.
Once the entire cabinet was removed from the wall, I discovered some lovely popcorn ceiling. This was promptly removed by spraying with water & scraping. I am applying tile to the entire back wall so I decided to install the shelves first, then tile, then paint. If you're just going to paint, you should probably do that prior to the shelf install.
My Original Plan
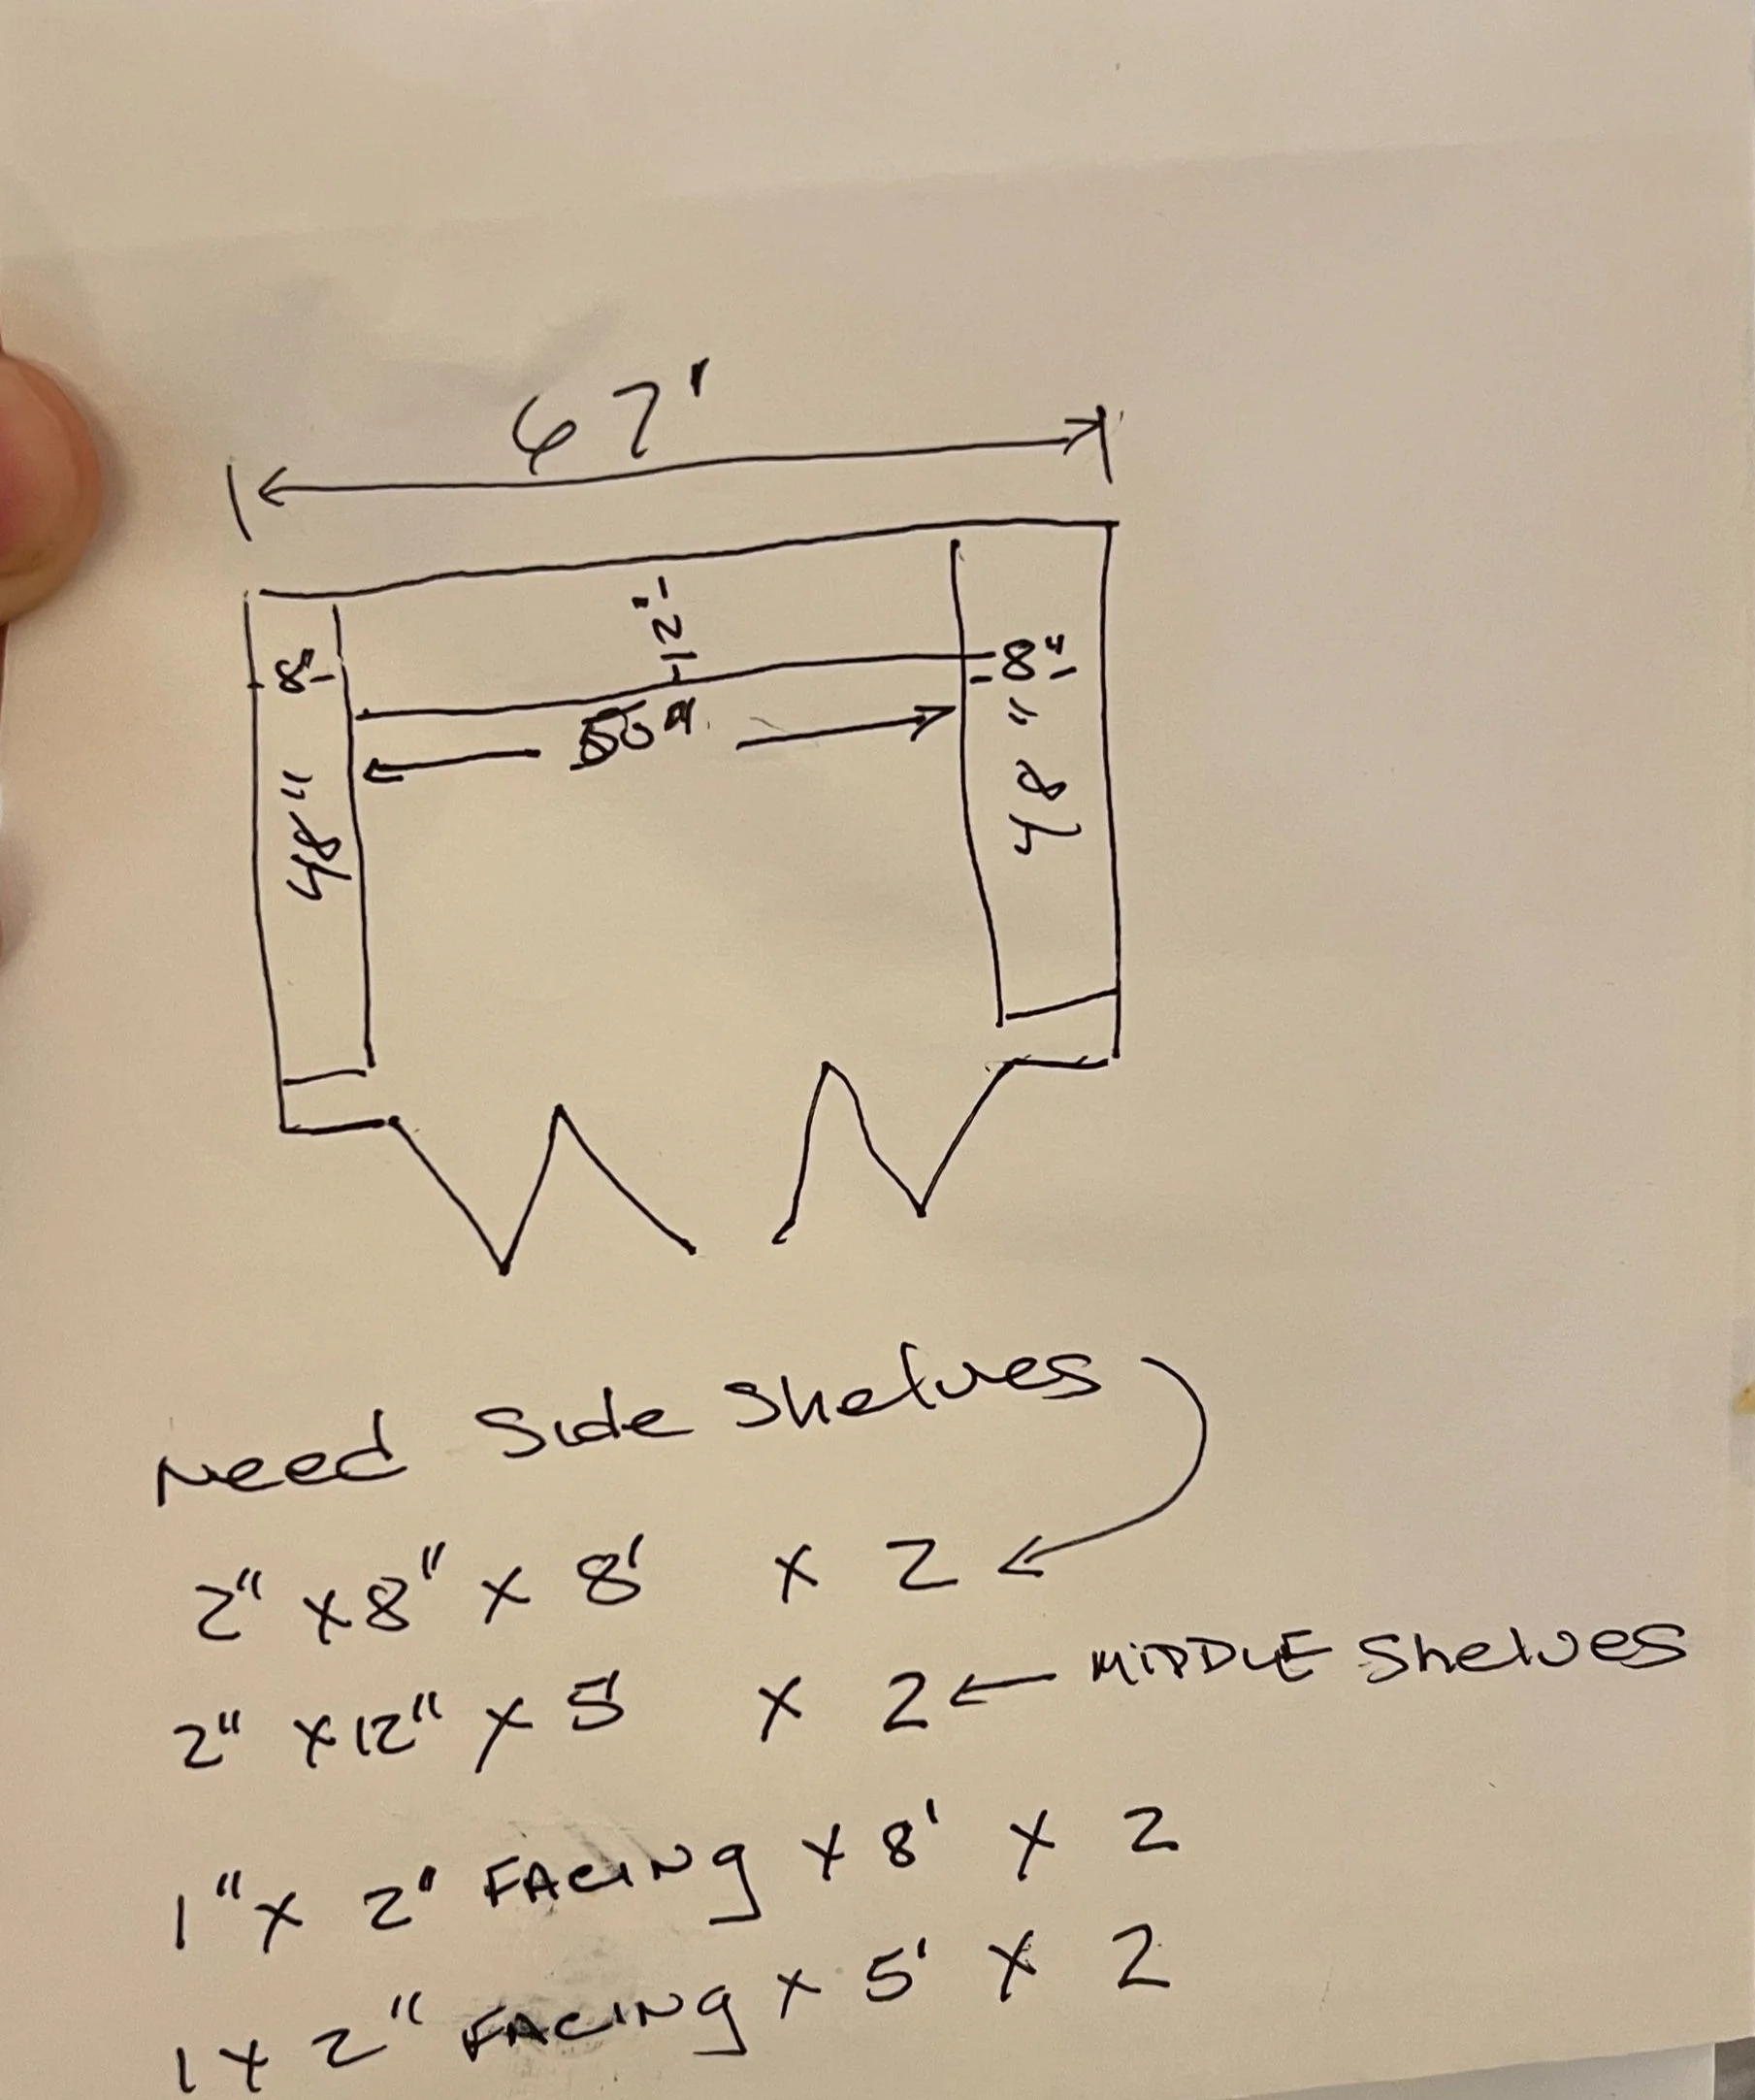
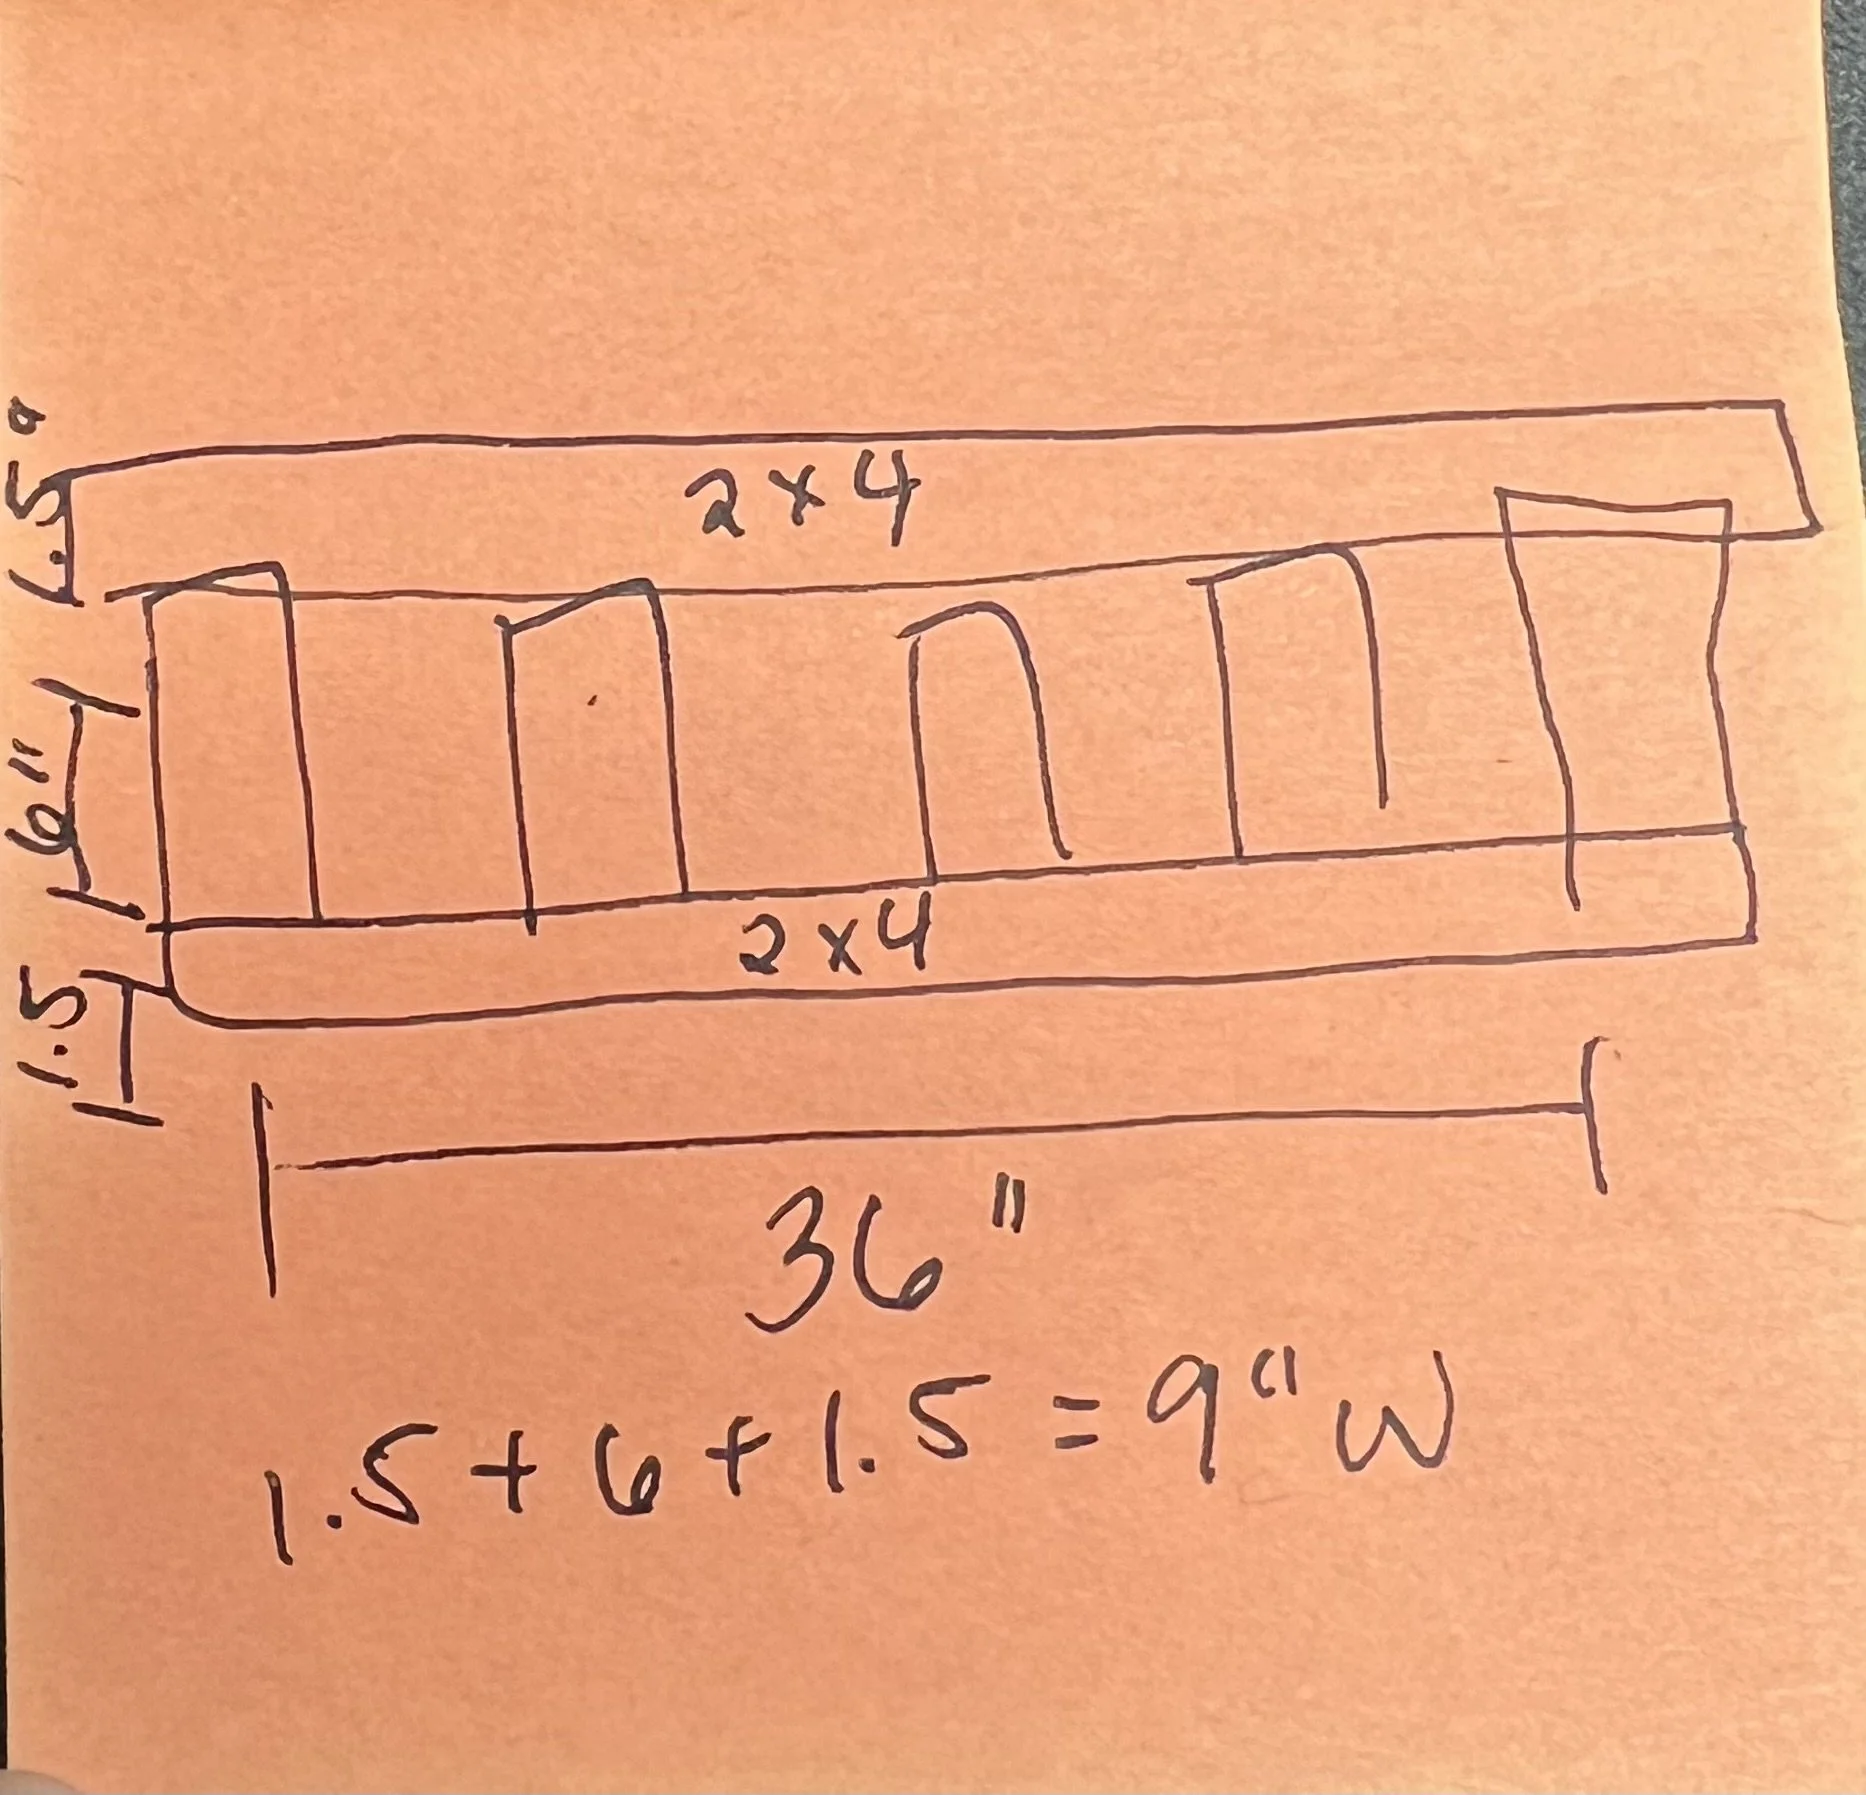
Originally, I was going to use these floating shelf brackets, drill into a 2"x8" and 2"x12" piece of wood, and insert the brackets. Here is the drawing of my plan, drawn out by none other than my incredible father! However, after seeing how expensive these brackets were with how many I would need, I decided I was just going to build my own cleats.
How I actually Did It
The Cleats
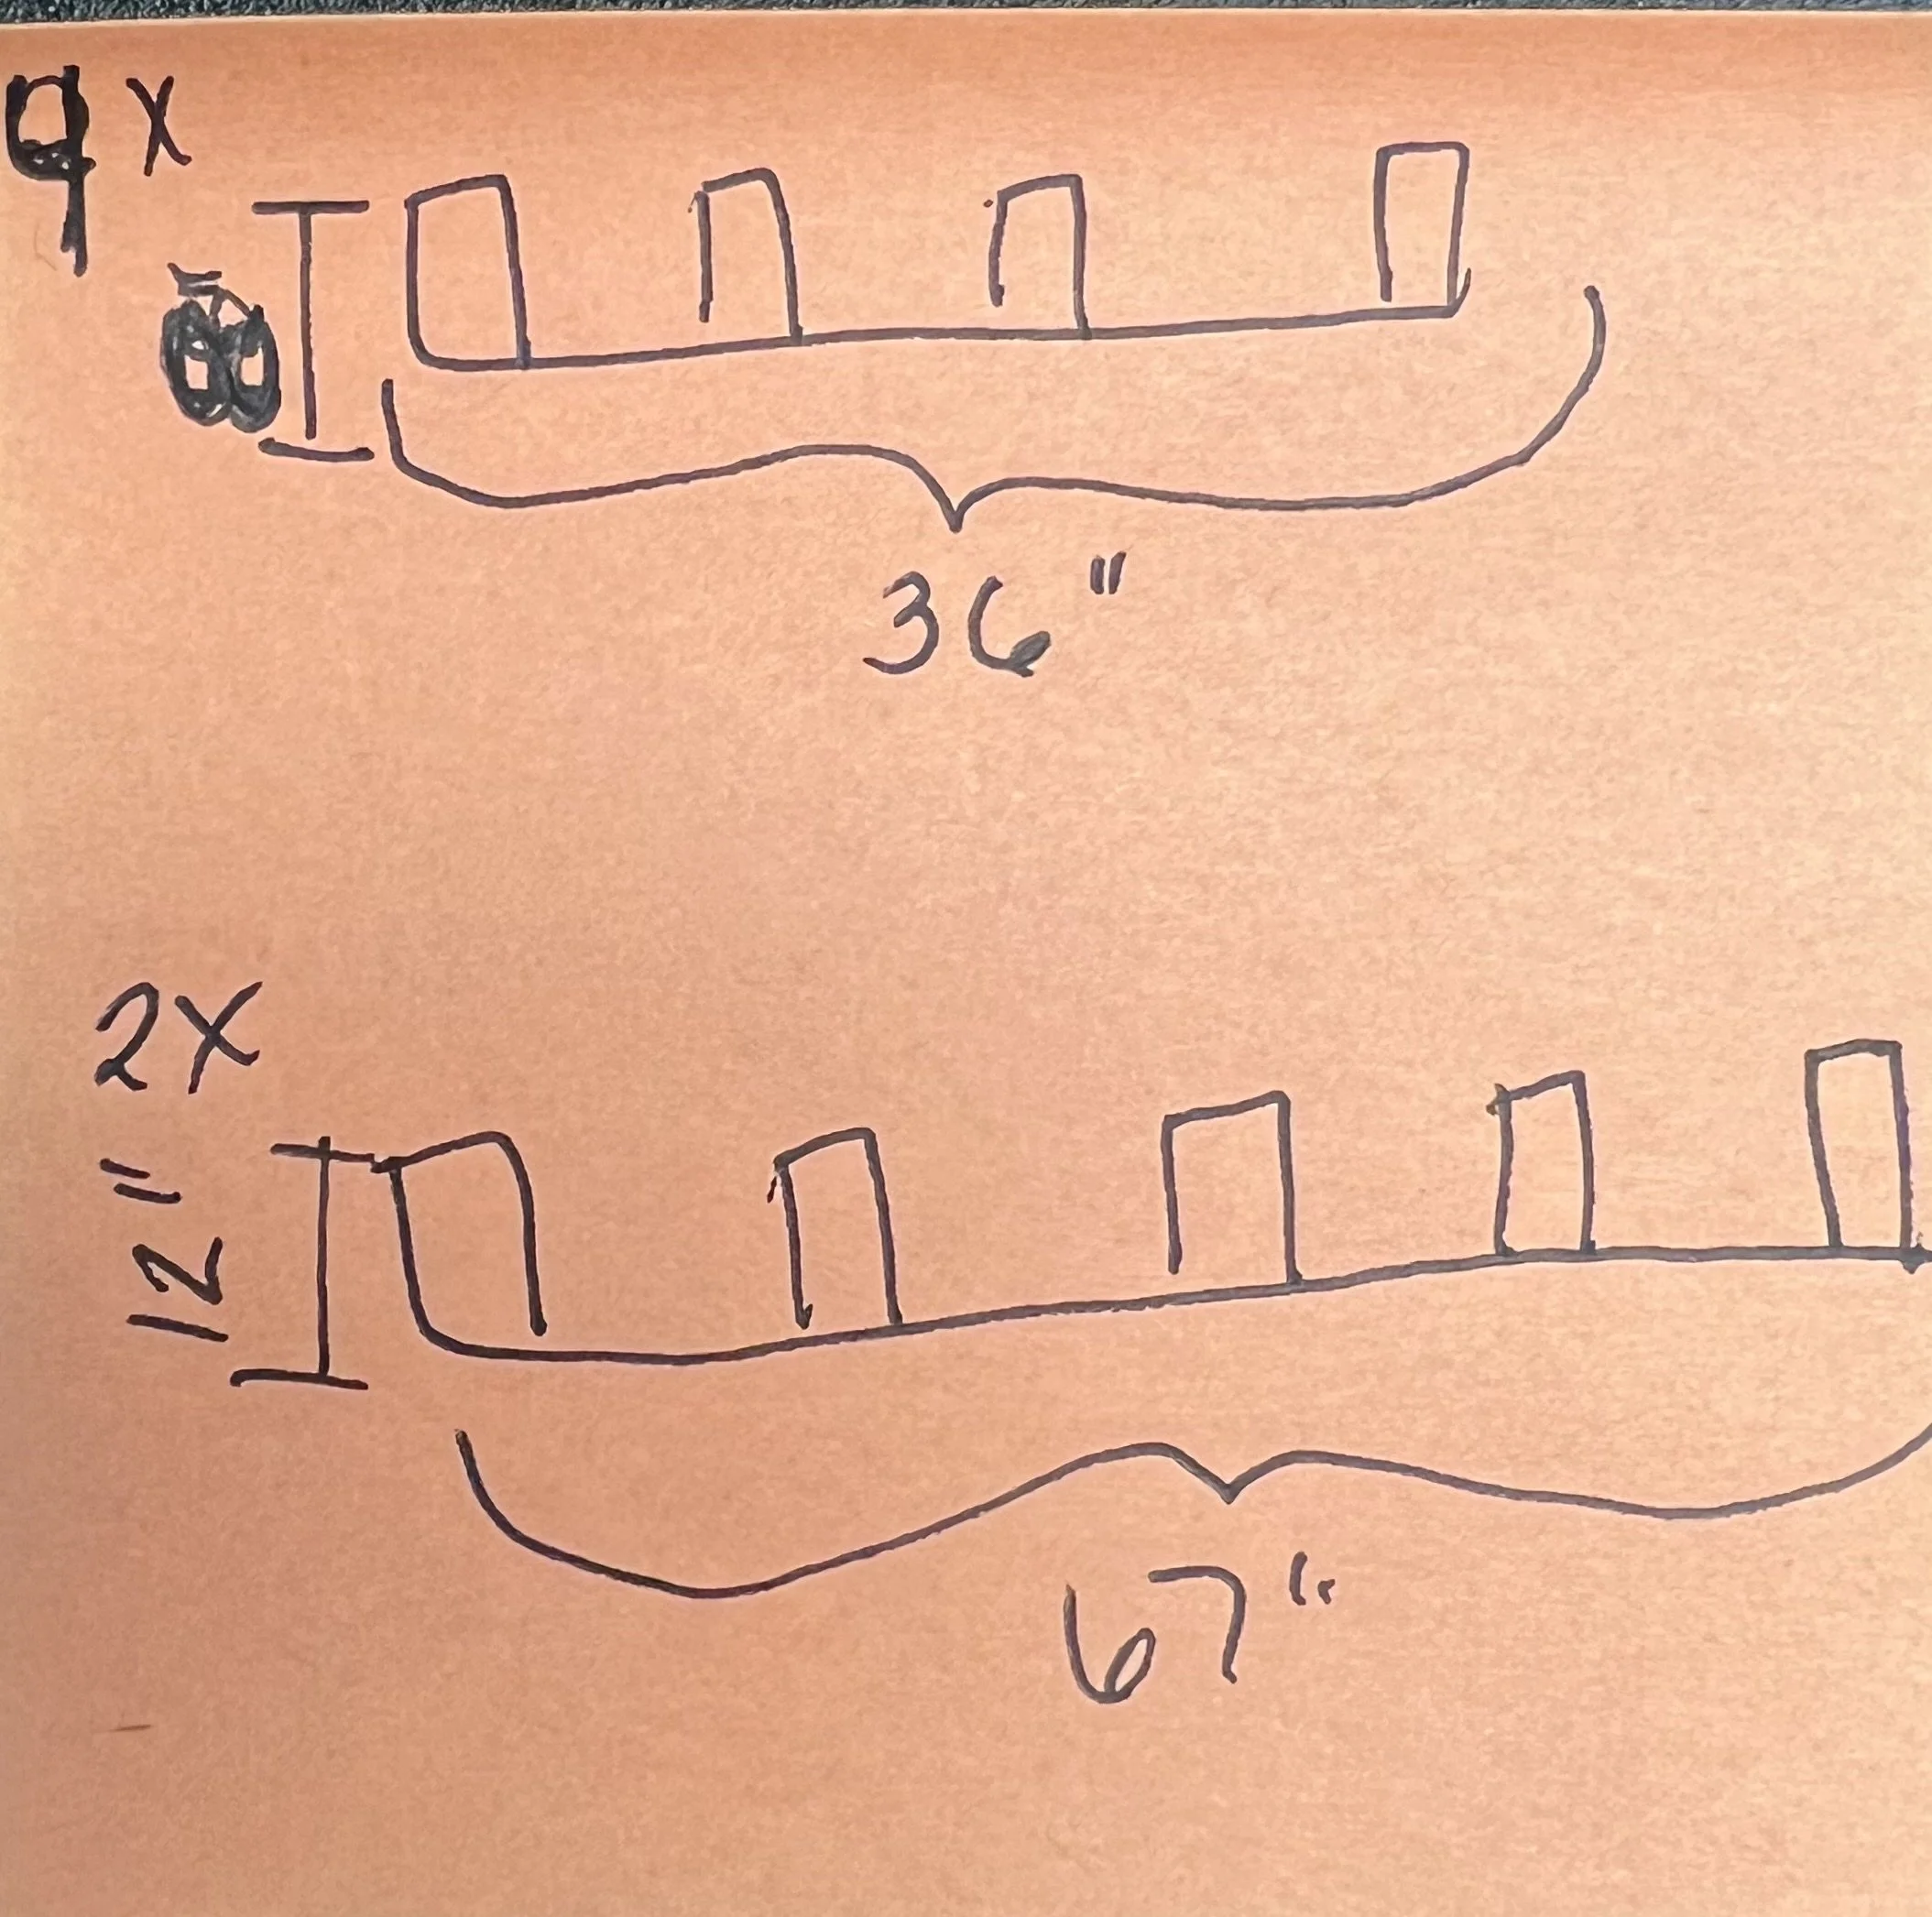
With furniture, I'm a very "just go with it" kind of gal. It will all work out, right? Yeah, well not when it comes to woodworking & needing exact measurements, LOL. My new plan included building 6 cleats which are basically wooden ladders, and nailing plywood onto the fronts to give it a faux beam look.
I bought 2x4 studs to build the cleats. This is after I accidentally spent an hour searching for straight 2x2s, only to buy them and get to my car realizing I needed 2x4s, not 2x2s, LOL. Anyways, I got home and used my HART miter saw to cut the 2x4's to length. I needed two 67" for the back walls, and four 36" for the sides. I needed the shelves on the sides to be slightly shorter in width than the back shelves, to allow room for my top loading washer to open. So, I planned for the side shelves to be 8" in width, and the back to be 12" in width.
For the side cleats - I cut 2x4s into pieces 6" in length. I will use these pieces to create the "steps" of the ladder on the cleats. I don't know why, but in the moment I had it in my head that my 2x4s were only 1" thick. So when I made the ladders/cleats, they were 9" in length total. Because 1.5 (actual width of 2x4) + 6 + 1.5 = 9. This mistake worked out because I was still able to open up the top loading washer. But to be honest… I didn’t realize this mistake until after my second round of buying wood. More on that later.
For back cleats - I cut my 2x4s into pieces 8" in length. Again, I was in my own world thinking I was working with 1x4s so this mistake made my back shelves 11" width instead of 12".
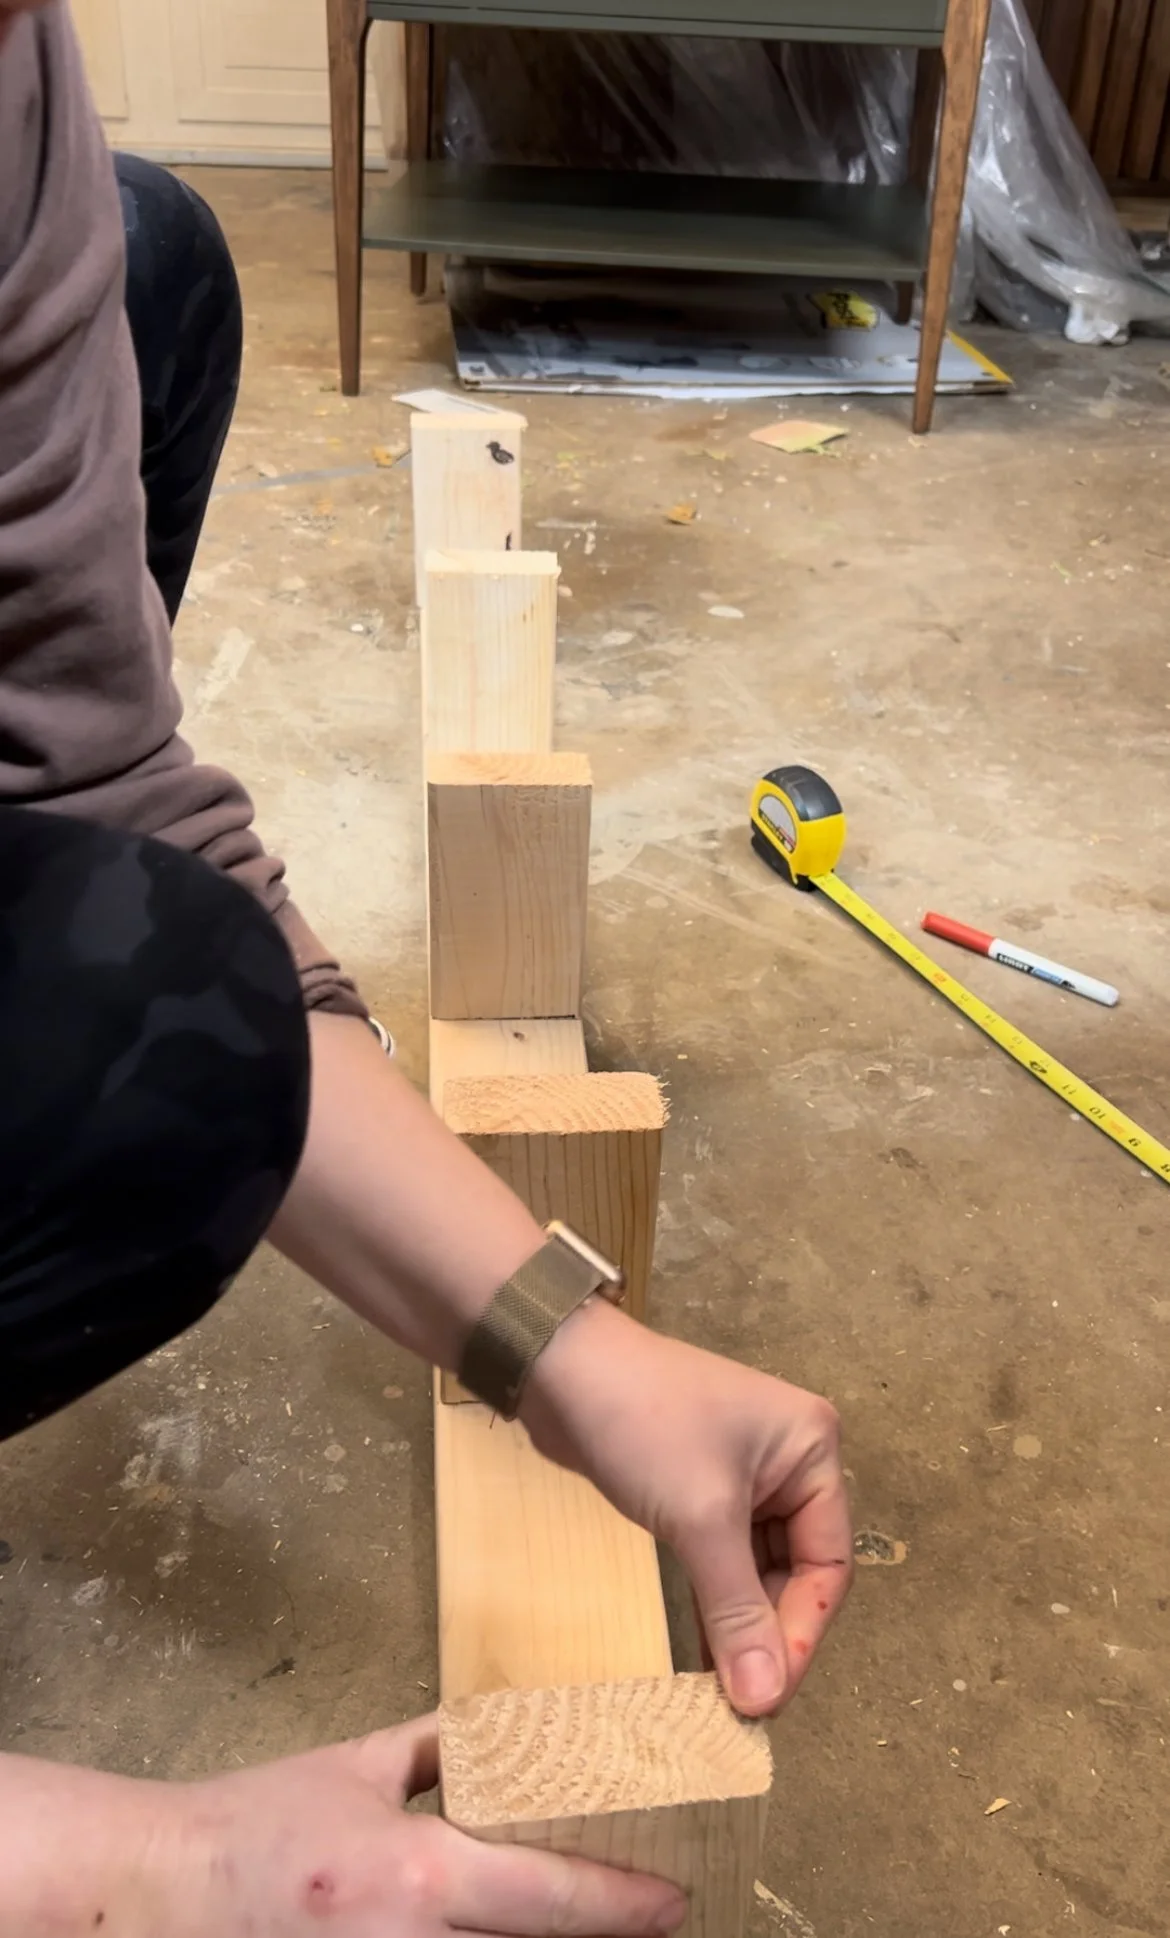
I marked the 36" and 67" cuts with where I wanted their "ladder steps" to be. I then dry fit with the cleat upside down, sat on it to keep it still (possible safety hazard?) and used my HART drill to make pilot holes. Make sure your drill bit is long enough! I then used my impact driver to screw in these 3.5" wood screws. You can also reinforce by using wood glue prior to screws, but that's up to you.
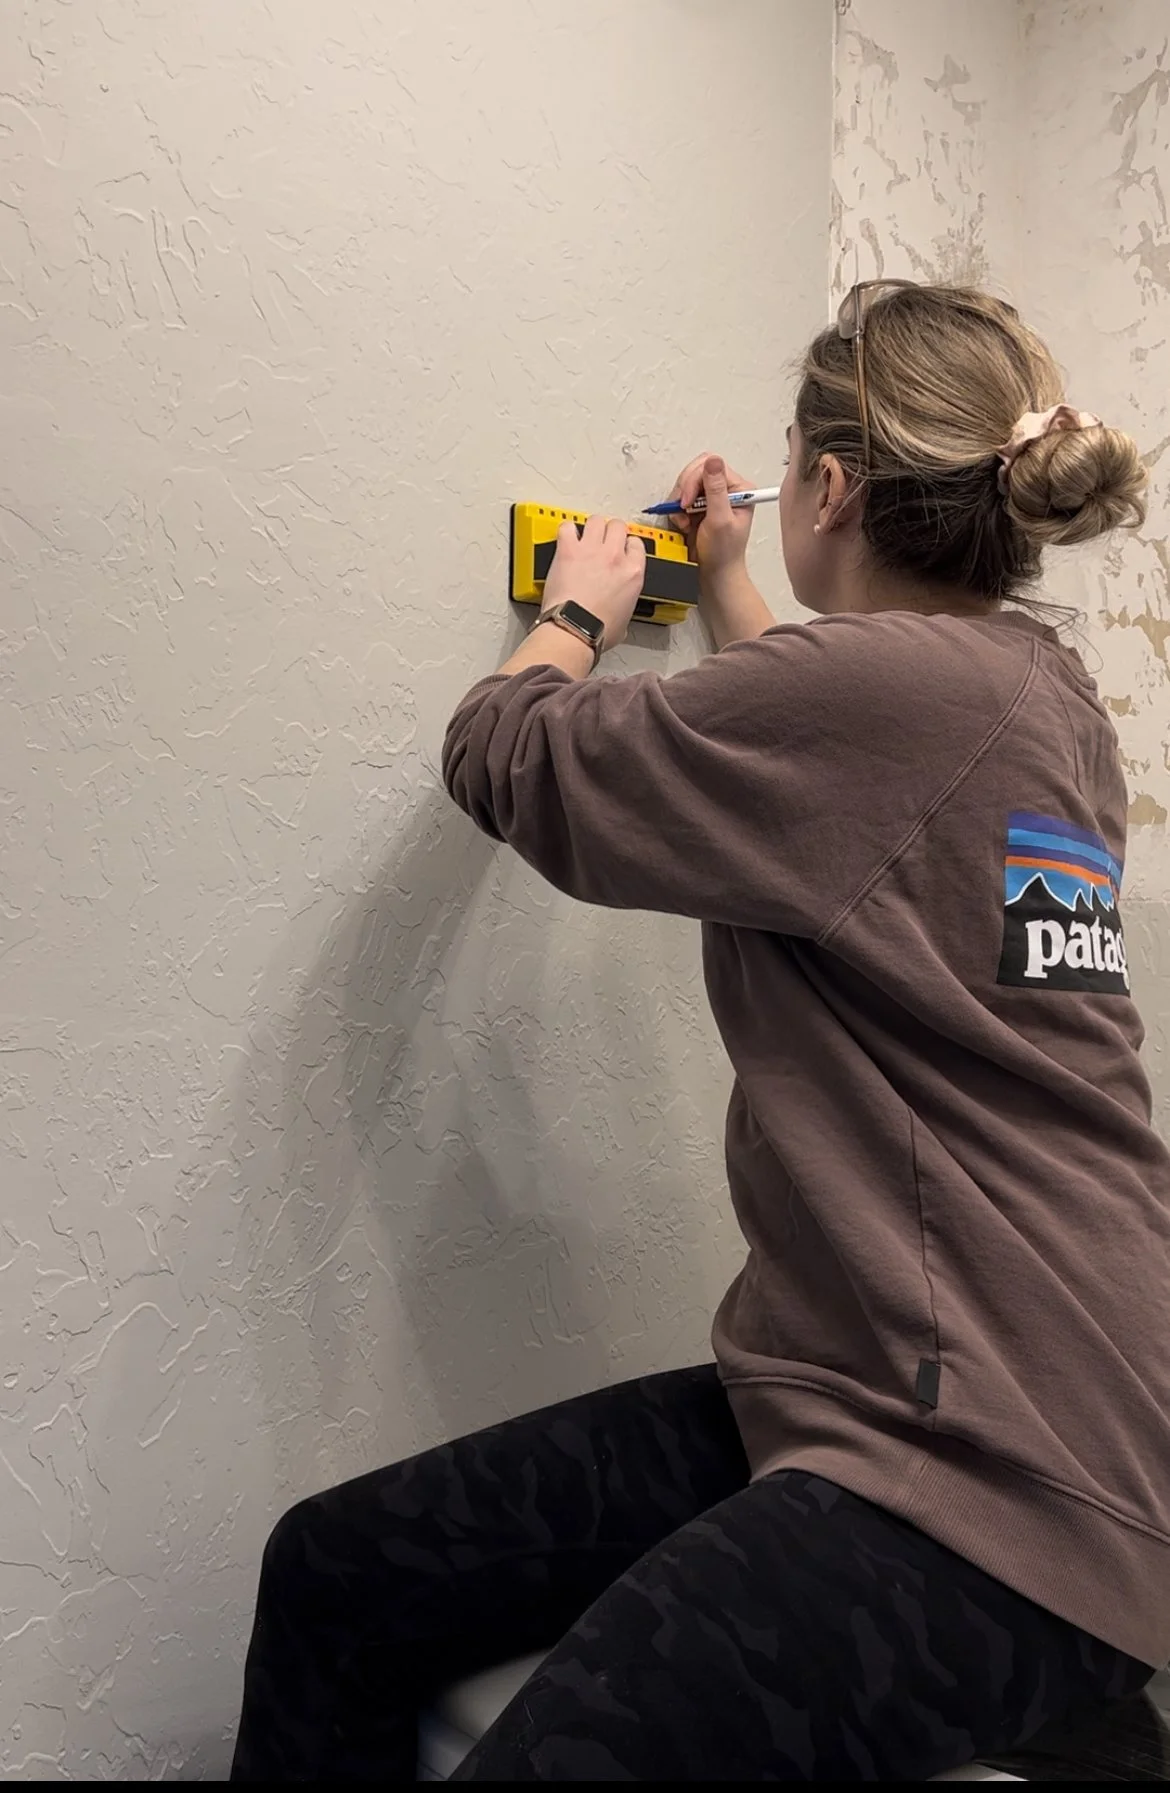
Pro tip: I recommend marking where your studs are on the wall & on your 2x4 prior to building your cleats. This will help you avoid building the cleat out over the area where the stud is.
I used this super great stud finder to help me get the most accurate stud placements. Whoever was building my house was a cheap bastard because all of our studs are 24" inches apart. This is a problem when I'm trying to attach side shelves, and only have one stud to attach an entire cleat too. I had to improvise and use some strong ass screws.
Anchoring to Studs
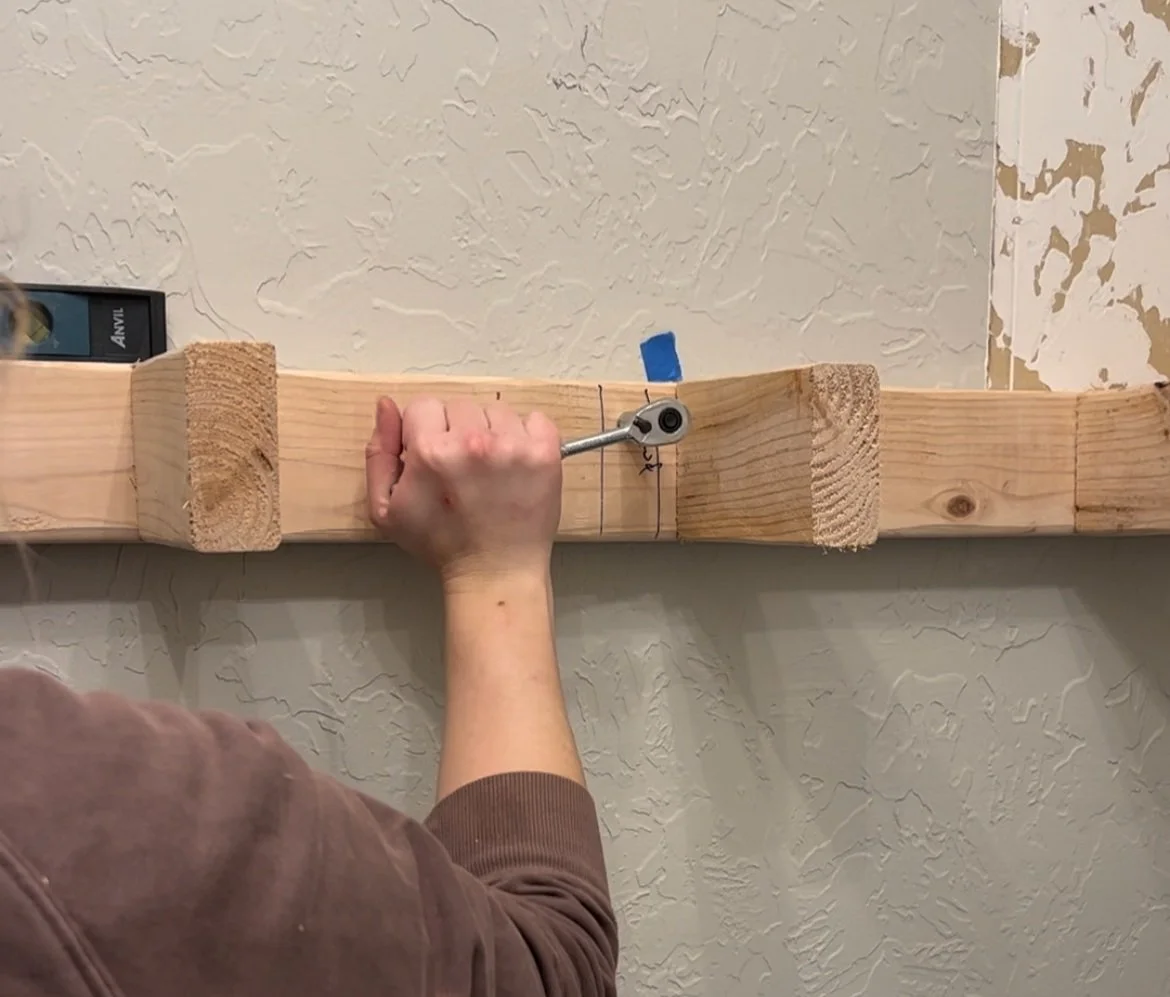
After talking with my super smart father, he recommended I use lag screws/bolts. Used 1/4 x 3 1/2 galvanized lag screws with a washer. I drilled a pilot hole into the cleat while holding it up to where one of the studs were, put in the screw and manually screwed it in with a ratchet. I like using a wrench, it was lowkey cathartic. I installed the back wall cleats first, then the sides. For the side shelves, I repeated the process to install the lag screw, which was in the middle of the cleat. From there, I drilled smaller pilot holes into near the ends of the cleat. Since the lag screw was in the middle, I was able to pivot the cleat and insert drywall anchors into those pilot holes. Once all 4 anchors were installed, I then screwed 3.5" wood screws into the pilot holes to secure.
Once all 6 cleats were installed onto the wall, I then attached another 2x4 in identical length to "close" the ladder/cleat. The reason why I didn’t do this before installing the entire thing is because it would've been significantly harder for me to get my drill & impact driver into the space with it on.
I did this install all by myself and it was completely doable - but it definitely would've been easier/less strenuous if I had someone to hold the cleats up for me while I drilled or to make sure it was level. I recommend leveling every 5 seconds, and using a laser level if you have one!
Making It Look Like a Floating Shelf
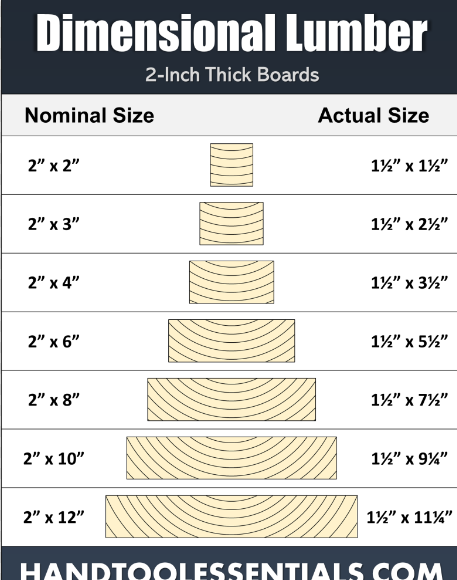
I thought this would be the easiest part, but it was honestly the most expensive & where I made the most mistakes. I tried using sanded plywood, had it cut to size at the store, but it looked like cheap garbage when I tried to stain it. That was $50 down the drain. My boyfriend suggested I use cedar wood since it looked really nice. I said F it, and bought $150 worth of cedar. If you're going to learn anything from reading all of this - please learn this… NOMINAL WOOD SIZES. A 2X4 IS NOT ACTUALLY 2 INCHES BY 4 INCHES. IT'S ACTUALLY 1 1/2 INCHES X 3 1/2 INCHES!!!
My Cedar & Nominal Wood Size Oopsie
So when I bought several $45 planks of cedar 1x8s for the top and bottom of the shelves, they were actually .5 x 7.5". You may think… why did you buy 1x8s if the shelf is 9" wide? I DON’T KNOW. But I did and it was an expensive oopsie. I can't return them because I cut them down at my house. I did buy 1x12' planks of cedar, and those actually fit the back shelfs. But then I realized how much thicker it would make the shelves appear, adding 1 inch total to the already 3.5" thick shelves. I like em' thiqq but not that thiqq.
SO, I went back to square one. This time I wrote down all my measurements & checked them twice. I then brought my own tape measure with me to Home Depot. I bought two 1/4 thick, 4x8' Luan plywood at $25 a sheet. The cheapest wood I had bought throughout this entire project - if only I had just bought that first, LOL. I had it cut down at the store into EIGHT 9" x 36" pieces for the side shelves. Each side shelf would use 2 pieces, one for top and bottom. I had them cut FOUR 11" by 49" pieces to use on the top & bottom of the two back shelves. I took the scraps home with me so I could bring them back and get them cut at a later time to use for the fronts.
Adding the Plywood
When I got home, I stained a small piece of the Luan just to make sure it looked good before installing. And it looked amazing! I dry fit the shelves & trimmed any as needed with my miter saw prior to install. I used my HART brad nailer to secure the Luan to the tops & bottom of each shelf.
The Almost Final Result
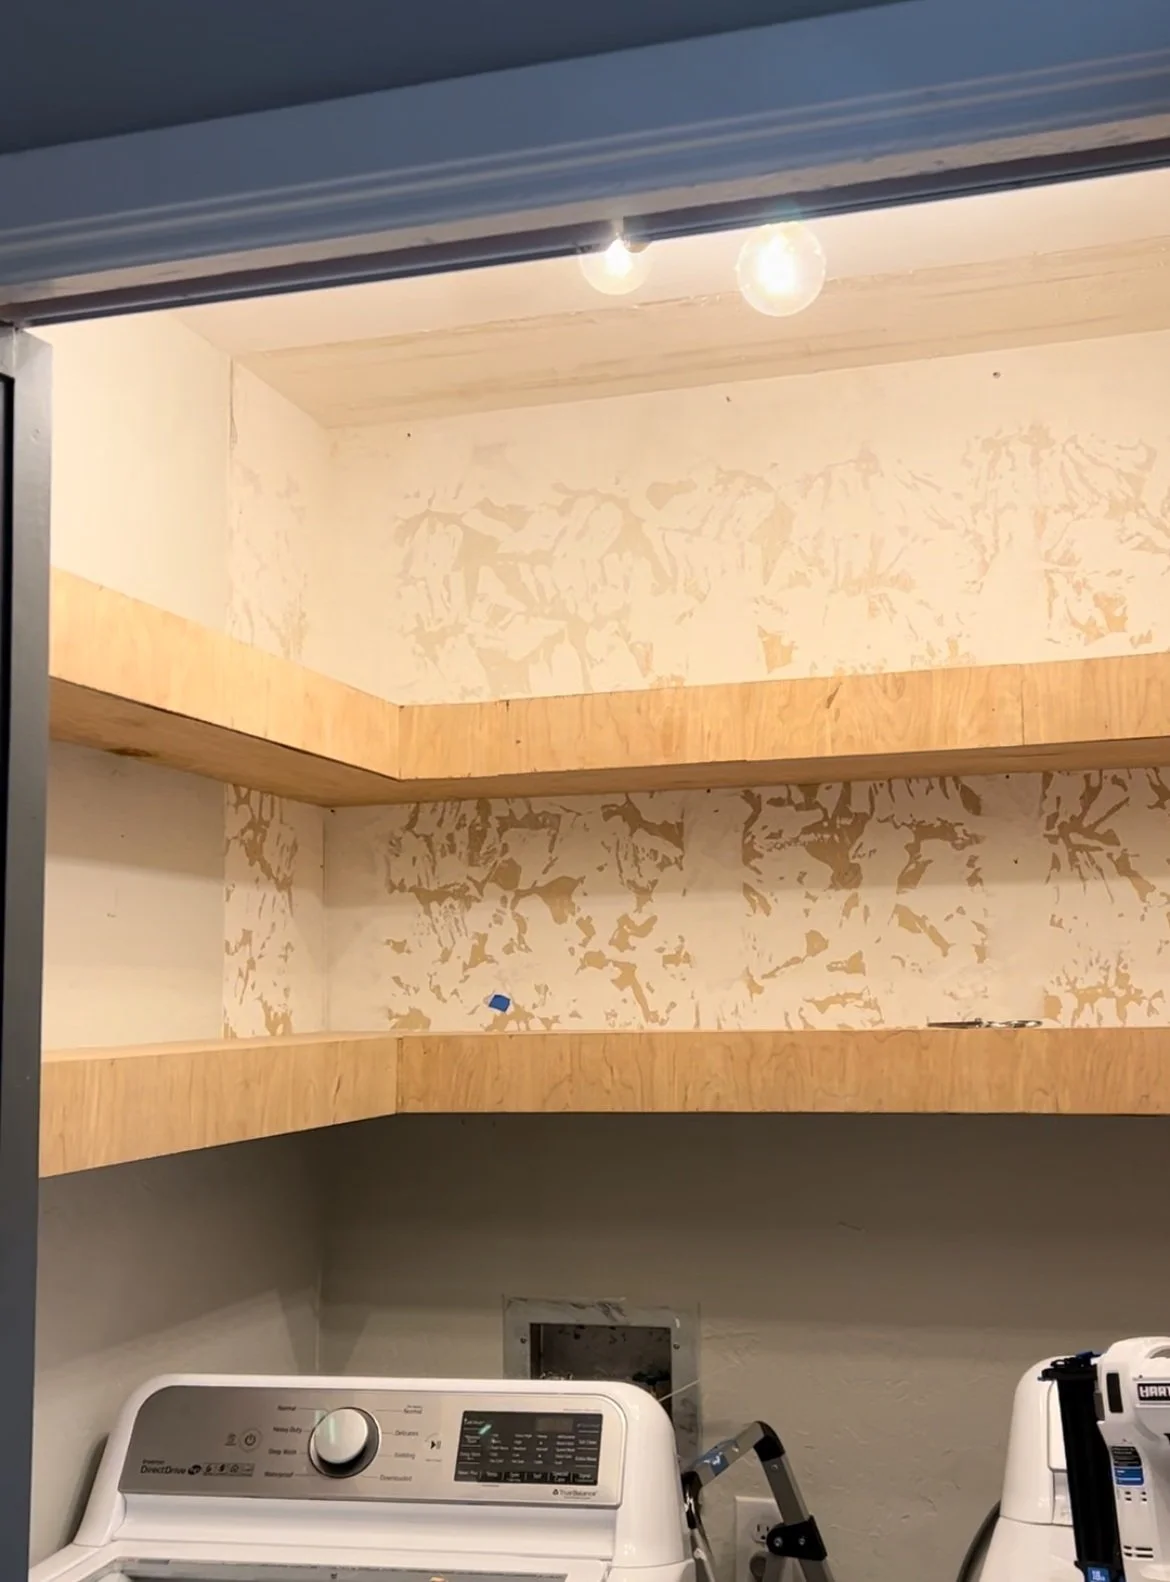
I then measured the new width of the shelves since I added 1/4" on top and bottom, and got 4". So I brought my Luan scraps back to Home depot, where they were trimmed to strips 4" in width. I cut them to size for length once I brought them home. I really don't care for how the fronts look, since there are some "rips" in the edges of the Luan. But, it'll do for now.
Once I am back from holiday, I will remove the Luan fronts, and replace with nicer, select pine for a more finished & boujee look. I just have to find actual 1x4s, not nominal 1x4s… *eye roll*
Here's the full supply list!
Disclosure: I only recommend products I would use myself and all opinions expressed here are my own. This post may contain affiliate links that at no additional cost to you, I may earn a small commission.
